Oracle RAC Grid Cluster Upgrade
Oracle RAC Grid Cluster Upgrade
As 12c Database version coming to EOS , it become important for DBAs to upgrade Oracle database and Grid Clusters to 19c. In this blog , We have come up with the steps to upgrade the Oracle RAC Grid Cluster.
Follow below steps to upgrade Oracle RAC Grid Cluster.
1) Take backup of ASM information and ASM metadata backup.
set line 240
col path for a30
col compatibility for a40
select INST_ID,group_number,NAME,COMPATIBILITY,STATE,total_mb,free_mb from gv$asm_diskgroup order by name;
col path for a30
col compatibility for a40
select INST_ID,group_number,NAME,COMPATIBILITY,STATE,total_mb,free_mb from gv$asm_diskgroup order by name;
set line 240
col path for a30
select group_number,NAME,COMPATIBILITY,STATE,total_mb,free_mb from v$asm_diskgroup;
col path for a30
select group_number,NAME,COMPATIBILITY,STATE,total_mb,free_mb from v$asm_diskgroup;
set lines 200 pages 200
col name for a30
col path for a40
select name,path,state,mount_status,header_status from v$asm_disk order by path;
col name for a30
col path for a40
select name,path,state,mount_status,header_status from v$asm_disk order by path;
set lines 200
set pages 9999
col path for a40
SELECT inst_id,name, header_status,OS_MB,TOTAL_MB,path FROM GV$ASM_DISK WHERE header_status <> 'MEMBER' order by OS_MB;
set pages 9999
col path for a40
SELECT inst_id,name, header_status,OS_MB,TOTAL_MB,path FROM GV$ASM_DISK WHERE header_status <> 'MEMBER' order by OS_MB;
ASM Metadata backup :
ASMCMD [+] > md_backup backup/ASM_METADATA.bck
2) Take cluster information backup
crsctl stat res -t | tee -a crs_before.txt
crsctl query crs activeversion | tee -a crs_before.txt
ocrcheck | tee -a crs_before.txt
crsctl query crs softwareversion | tee -a crs_before.txt
crsctl query crs releaseversion | tee -a crs_before.txt
crsctl query crs activeversion | tee -a crs_before.txt
crsctl query crs softwarepatch | tee -a crs_before.txt
olsnodes -n -t | tee -a crs_before.txt
$GRID_HOME/bin/kfod op=patches | tee -a crs_before.txt
$GRID_HOME/bin/kfod op=patchlvl | tee -a crs_before.txt
kfod op=patches | tee -a crs_before.txt
kfod op=patchlvl | tee -a crs_before.txt
crsctl query crs activeversion -f | tee -a crs_before.txt
opatch lspatches | tee -a crs_before.txt
crsctl query crs softwarepatch | tee -a crs_before.txt
crsctl query crs releasepatch | tee -a crs_before.txt
crsctl query crs activeversion | tee -a crs_before.txt
crsctl query crs releaseversion | tee -a crs_before.txt
crsctl query crs softwareversion | tee -a crs_before.txt
crsctl query crs softwareversion -all | tee -a crs_before.txt
crsctl query crs activeversion -all | tee -a crs_before.txt
crsctl query crs activeversion | tee -a crs_before.txt
ocrcheck | tee -a crs_before.txt
crsctl query crs softwareversion | tee -a crs_before.txt
crsctl query crs releaseversion | tee -a crs_before.txt
crsctl query crs activeversion | tee -a crs_before.txt
crsctl query crs softwarepatch | tee -a crs_before.txt
olsnodes -n -t | tee -a crs_before.txt
$GRID_HOME/bin/kfod op=patches | tee -a crs_before.txt
$GRID_HOME/bin/kfod op=patchlvl | tee -a crs_before.txt
kfod op=patches | tee -a crs_before.txt
kfod op=patchlvl | tee -a crs_before.txt
crsctl query crs activeversion -f | tee -a crs_before.txt
opatch lspatches | tee -a crs_before.txt
crsctl query crs softwarepatch | tee -a crs_before.txt
crsctl query crs releasepatch | tee -a crs_before.txt
crsctl query crs activeversion | tee -a crs_before.txt
crsctl query crs releaseversion | tee -a crs_before.txt
crsctl query crs softwareversion | tee -a crs_before.txt
crsctl query crs softwareversion -all | tee -a crs_before.txt
crsctl query crs activeversion -all | tee -a crs_before.txt
Connect to asm instance as sysasm and run below command.
SELECT SYS_CONTEXT('SYS_CLUSTER_PROPERTIES', 'CLUSTER_STATE') FROM DUAL;
SELECT SYS_CONTEXT('SYS_CLUSTER_PROPERTIES', 'CLUSTER_STATE') FROM DUAL;
3) Take backup of the OCR and OLR.
root@> ocrconfig -manualbackup
'Run below command on all cluster nodes:
root@> ocrconfig -local -manualbackup
4) Check and confirm Pre-requirement are full filled.
==> Make sure you have sufficient space in binary directory on all the RAC nodes.
==>If you upgrading the cluster from 12.1.0.2 version , make sure OCR disk group have 125Gb of space allocated to it. If not follow below steps to create new disk group and move OCR,Voting file and ASM SPfile to ne disk group.
SQL> create diskgroup OCRDG19C high redundancy disk '','';
SQL> alter diskgroup OCRDG19C set attribute 'compatible.asm'='12.1.0.0.0';
SQL> alter diskgroup OCRDG19C set attribute 'compatible.asm'='12.1.0.0.0';
Mount disk group on all the cluster nodes.
Move OCR and voting file to new disk group.
root@> ocrconfig -showbackup
root@> ocrconfig -manualbackup
root@> ocrconfig -local -manualbackup
root@> ocrconfig -add +OCRDG19C
root@> ocrcheck
root@> crsctl replace votedisk +OCRDG19C
root@> crsctl query css votedisk
root@> ocrcheck
root@> ocrconfig -delete +OCRDG12C
root@> ocrcheck
root@> ocrconfig -manualbackup
root@> ocrconfig -local -manualbackup
root@> ocrconfig -add +OCRDG19C
root@> ocrcheck
root@> crsctl replace votedisk +OCRDG19C
root@> crsctl query css votedisk
root@> ocrcheck
root@> ocrconfig -delete +OCRDG12C
root@> ocrcheck
Move asm spfile to new asm diskgroup
>asmcmd pwcopy /u01/app/12.1.0.2/grid/dbs/orapw+ASM +OCRDG19C/orapwASM
>asmcmd pwset --asm +OCRDG19C/orapwASM
>asmcmd pwget --asm
+OCRDG19C/orapwASM
>asmcmd pwcopy /u01/app/12.1.0.2/grid/dbs/orapw+ASM +OCRDG19C/orapwASM
>asmcmd pwset --asm +OCRDG19C/orapwASM
>asmcmd pwget --asm
+OCRDG19C/orapwASM
Post above changes restart CRS on all cluster nodes in Rolling Mode and make sure CRS comes up properly.
Unmount +OCRDG12C diskgroup.
==> If you are upgrading cluster from 12.1.0.2 version drop MGMT database.
Follow below steps to remove MGMT database.
# As root user in BOTH nodes
#Node 1
[root@node1 ~]# export ORACLE_HOME=/u01/app/12.1.0.2/grid
[root@node1 ~]# export PATH=$PATH:$ORACLE_HOME/bin
[root@node1 ~]# crsctl stop res ora.crf -init
[root@node1 ~]# crsctl modify res ora.crf -attr ENABLED=0 -init
[root@node1 ~]# export ORACLE_HOME=/u01/app/12.1.0.2/grid
[root@node1 ~]# export PATH=$PATH:$ORACLE_HOME/bin
[root@node1 ~]# crsctl stop res ora.crf -init
[root@node1 ~]# crsctl modify res ora.crf -attr ENABLED=0 -init
#Node 2
[root@node2 ~]# export ORACLE_HOME=/u01/app/12.1.0.2/grid
[root@node2 ~]# export PATH=$PATH:$ORACLE_HOME/bin
[root@node2 ~]# crsctl stop res ora.crf -init
[root@node2 ~]# crsctl modify res ora.crf -attr ENABLED=0 -init
[root@node2 ~]# export ORACLE_HOME=/u01/app/12.1.0.2/grid
[root@node2 ~]# export PATH=$PATH:$ORACLE_HOME/bin
[root@node2 ~]# crsctl stop res ora.crf -init
[root@node2 ~]# crsctl modify res ora.crf -attr ENABLED=0 -init
# As oracle User on Node 1
oracle@node1 : export ORACLE_HOME=/u01/app/12.1.0.2/grid
oracle@node1 : export PATH=$PATH:$ORACLE_HOME/bin
oracle@node1 : srvctl relocate mgmtdb -node node1
oracle@node1 : srvctl stop mgmtdb
oracle@node1 : srvctl stop mgmtlsnr
/u01/app/12.1.0.2/grid/bin/dbca -silent -deleteDatabase -sourceDB -MGMTDB
oracle@node1 : export PATH=$PATH:$ORACLE_HOME/bin
oracle@node1 : srvctl relocate mgmtdb -node node1
oracle@node1 : srvctl stop mgmtdb
oracle@node1 : srvctl stop mgmtlsnr
/u01/app/12.1.0.2/grid/bin/dbca -silent -deleteDatabase -sourceDB -MGMTDB
oracle@node1 : srvctl remove mgmtdb
Remove the database _mgmtdb? (y/[n]) y
Remove the database _mgmtdb? (y/[n]) y
==> Make new Grid Directory on all the cluster nodes.
mkdir /u01/app/19.0.0/grid/
cd /u01/app
chown -R oracle:dba 19.0.0/grid/
chmod 755 19.0.0
chmod 755 grid
Extract Binary :
cp LINUX.X64_193000_grid_home.zip /u01/app/19.0.0/grid/
cd /u01/app/19.0.0/grid/
unzip LINUX.X64_193000_grid_home.zip
rm LINUX.X64_193000_grid_home.zip
cd /u01/app/19.0.0/grid/
unzip LINUX.X64_193000_grid_home.zip
rm LINUX.X64_193000_grid_home.zip
==> Take Backup of old grid binary on one of the cluster node.
crsctl stop crs (one node)
cd /backup/
tar -cvf gridhome.tar /u01/app/12.2.0.0/
crsctl start crs
cd /backup/
tar -cvf gridhome.tar /u01/app/12.2.0.0/
crsctl start crs
==> Run Grid upgrade pre-check:
./runcluvfy.sh stage -pre crsinst -upgrade -rolling -src_crshome /u01/app/12.2.0/grid -dest_crshome /u01/app/19.0.0/grid -dest_version 19.0.0.0.0 -fixup -verbose
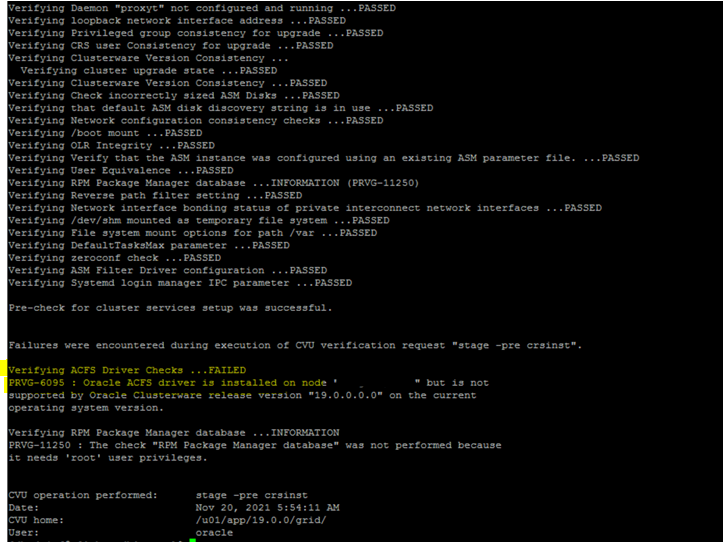
End lines for the above command:
Above highlighted error in know error. Check oracle doc :Exadata: cluvfy PRVG-6095 : Oracle ACFS driver is installed on node <node> but is not supported by Oracle Clusterware release version "19.0.0.0.0" on the current operating system version (Doc ID 2643995.1)
As per the solution in above doc , We need to download latest PSU patch and apply PSU along with upgrade command. Use below command :
<gi_home_19c>/gridSetup.sh -applyRU /u01/src/<LatestPSU> -J-Doracle.install.mgmtDB=false -J-Doracle.install.mgmtDB.CDB=false -J Doracle.install.crs.enableRemoteGIMR=false
Before running above command make sure you have latest OPatch on the Grid Binary. Follow below steps:
Upgrade OPatch on Grid software and verify
$ export ORACLE_HOME=/u01/app/12.1.0.2/grid
$ mv $ORACLE_HOME/OPatch $ORACLE_HOME/OPatch_bkp_121013
$ unzip /backup/patch/april_2019/p6880880_121010_Linux-x86-64.zip -d $ORACLE_HOME
$ opatch version
$ export ORACLE_HOME=/u01/app/12.1.0.2/grid
$ mv $ORACLE_HOME/OPatch $ORACLE_HOME/OPatch_bkp_121013
$ unzip /backup/patch/april_2019/p6880880_121010_Linux-x86-64.zip -d $ORACLE_HOME
$ opatch version
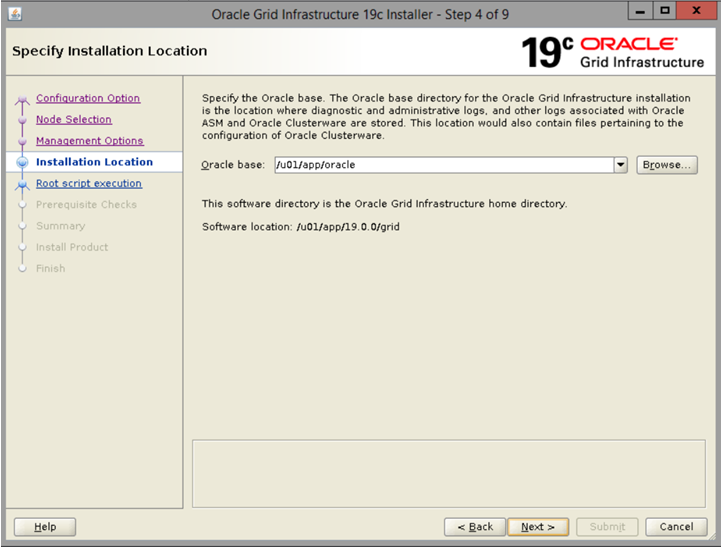
5) Proceed to upgrade Grid
/u01/app/19.0.0/grid/gridSetup.sh -applyRU /u01/src/32895426 -J-Doracle.install.mgmtDB=false -J-Doracle.install.mgmtDB.CDB=false -J Doracle.install.crs.enableRemoteGIMR=false
NOTE: Above command is applying PSU Patch first. And then it will pop-up the screen for the upgrade of the grid cluster.
Click Next..
Select Both nodes and click next
Click next
Pre-Check done..
Make sure the is no mandatory requirement.
Above errors can be ignored. Check and verify the summary and click next.
Click next
Run rootupgrade.sh..
Run Rootupgrade.sh on other nodes.
Click Ok on run rootupgrade.sh.
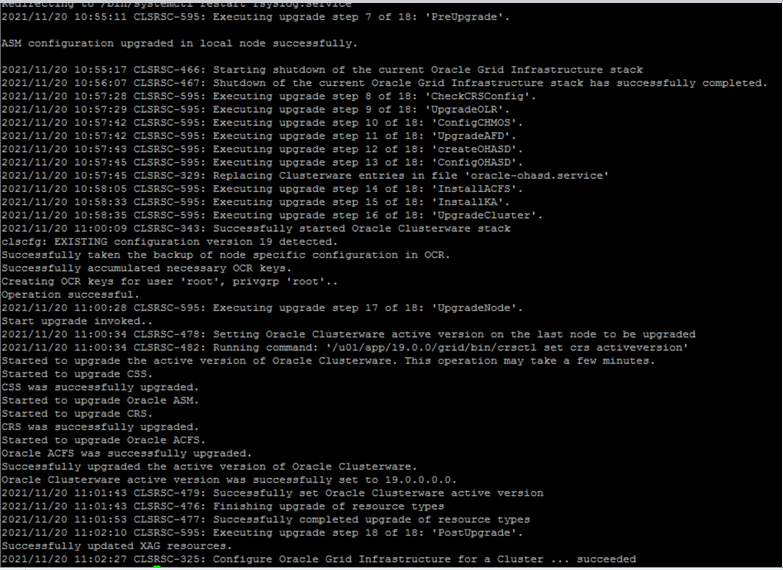
Below is screen at the end of the upgrade.
6) Verify Cluster post upgrade.
cluvfy stage -post crsinst -collect cluster -gi_upgrade -n all
You can learn more about oracle database administration:
Pro Oracle GoldenGate for the DBA
Oracle Security Tools Installation and Configuration
=================================================================
Please check our other blogs for Oracle RAC & Cluster.


Comments
Post a Comment
Please do not enter any spam link in comment Section suggestions are Always Appreciated. Thanks.. !